DIY Bar Update
DIY Bar Update
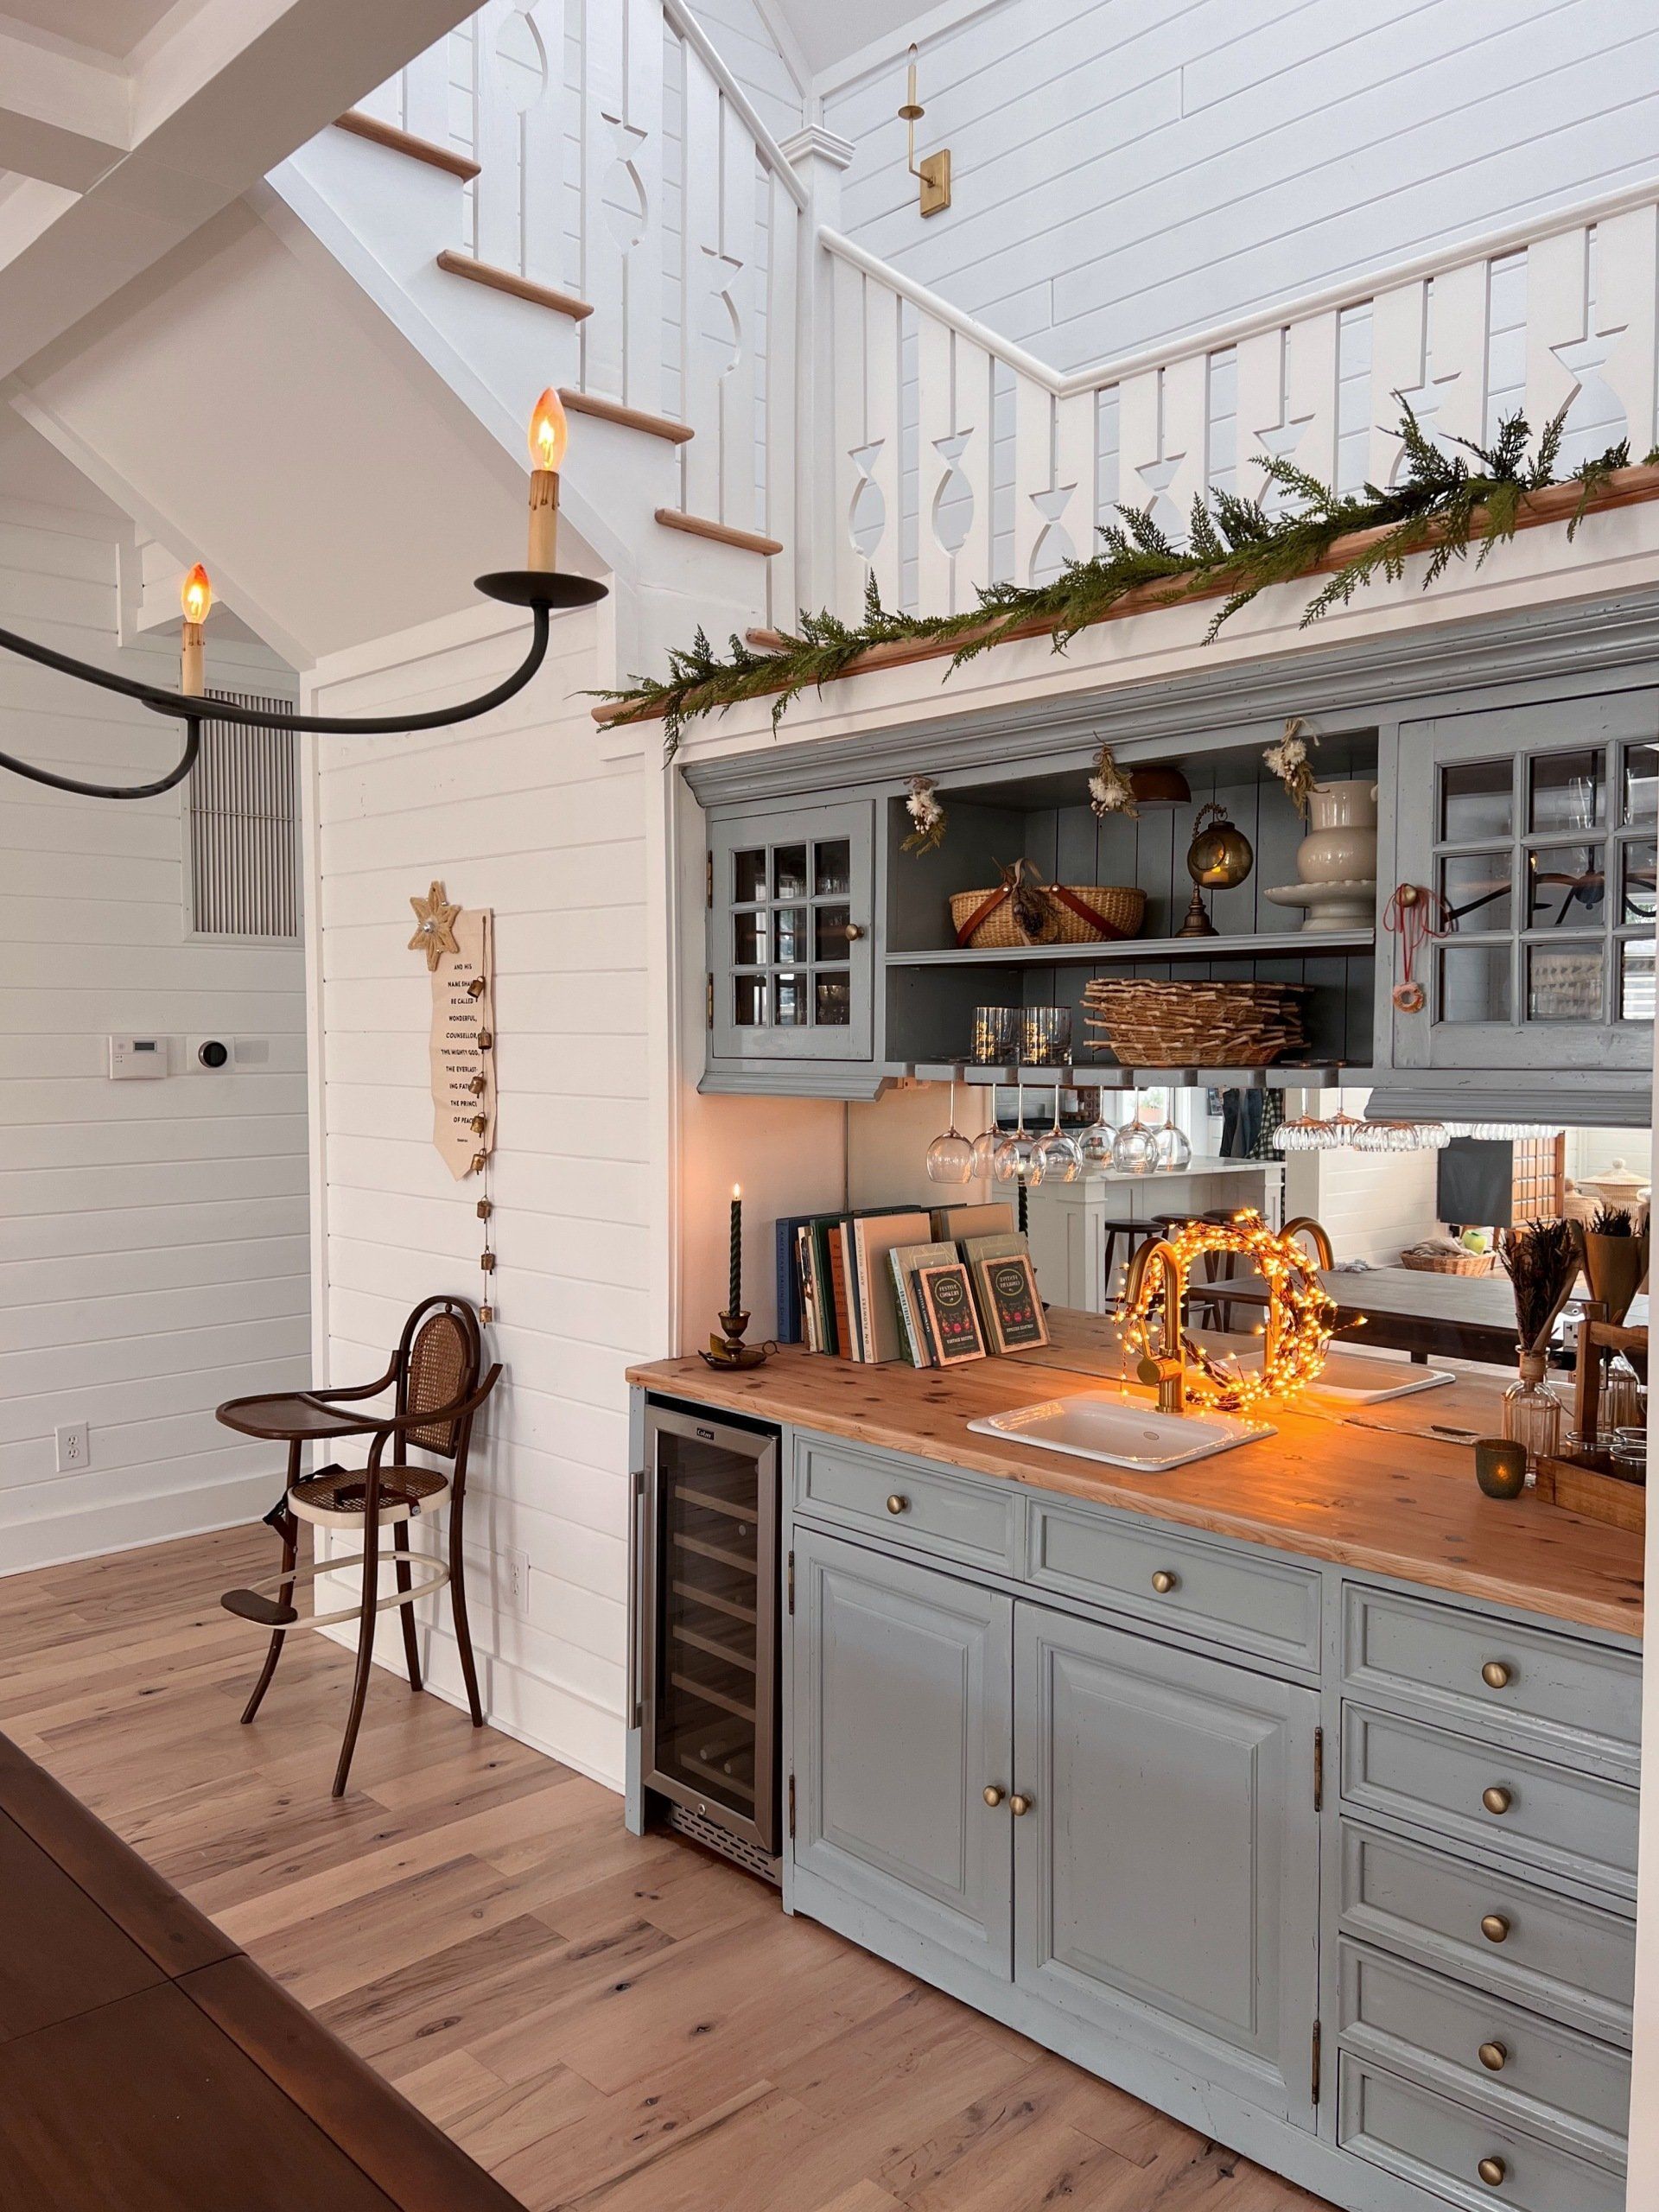
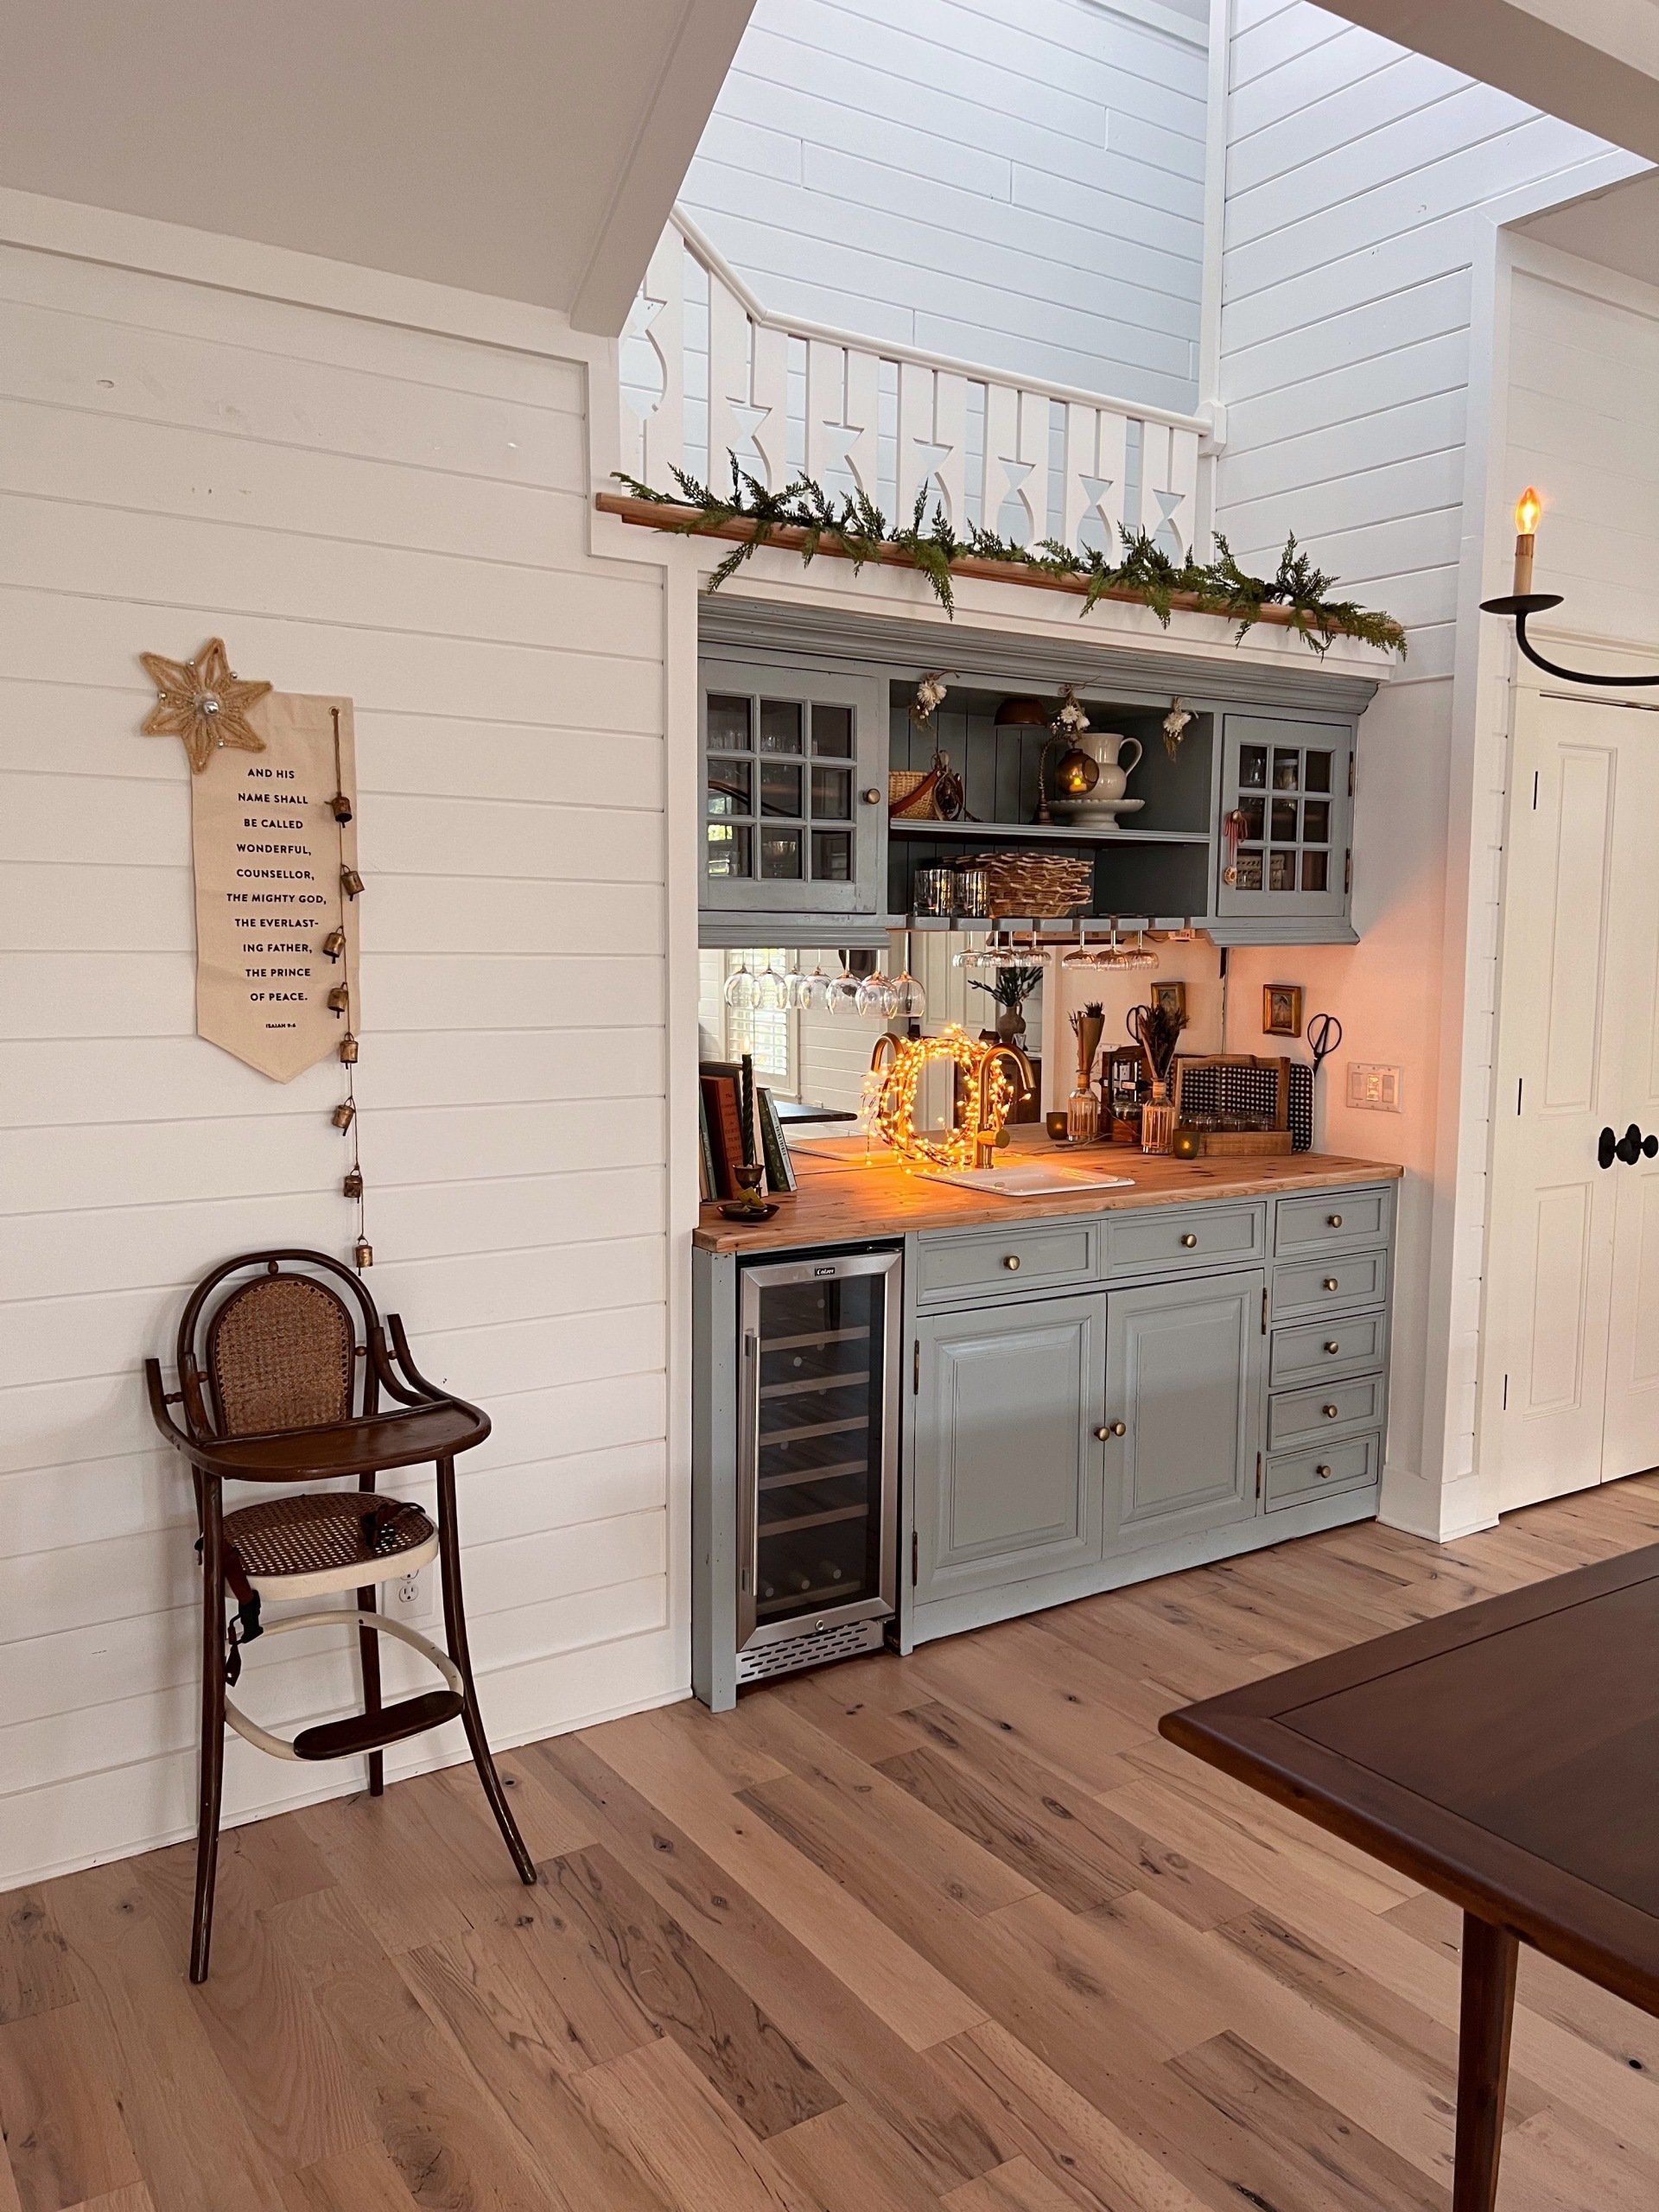
I love how easy updates like paint, new hardware and new faucets can transform a space - they are inexpensive, but game changers. And this bar is such a focal point of the room, I wanted to make something really special out of it.
I wanted the look to 'flow' with the rest of the room, but pop at the same time. I knew it needed some color!
I started by priming the hutch and bar cabinets. I taped off the parts touching the wall, but the parts around the windows I just free handed very carefully. I find painting carefully is a soothing because you can completely zone out. But if that's not for you, you can totally tape everything off and go to town!
I decided to take out the curve accent to give it a more modern look. I thought we’d keep that piece just in case, but in order to get it out, Dino had to smash it! That's strong woodwork for you, lol.
The color I used is Benjamin Moore Boothbay Gray. I did two coats with the sample can and even had some left over - paint goes a long way! Sample paint is just fine to use on a project, just be sure to seal it after.
I wanted to see if we could create a cooler tone by sanding the wood top down. So DIT Dino sanded down the bar top with an orbital sander. We tried a few different things on the wood top because we needed to finish it with something - we couldn’t leave it raw because then it would soak up anything we spilled on it. And this is where we entertain, make fun cocktails and it was sure to be spilled on. Tung oil made it too orange and mineral oil made it too warm. Even if I put a clear, water base coat on it, it would still bring out some of the warmth. So I did a slight white wash on the wood top, which is basically a little white paint and some water. It took a few different tries and method adjustments, but we got it and it turned out perfectly! I took a rag and rubbed in the white wash like you would a stain. Less paint and more water is the key and we found using a wet rag worked well because it allowed it to spread out nice and even. Then I can do the water base sealer on top!
Next came the finishing touches!
Because we had moved that curved trim piece, you could see the little light that was in there, so I was trying to think of what we had around the house to make a little light cover with. I had found little ceramic bowls we got from Target for $3.99 and it was the perfect size. But it was harder than we thought it was going to be. Dino worked on it for a long time, but I wanted it to be an easy DIY, so I thought of another idea! We popped the light off and took it apart and then placed it inside the bowl and then weaved the wires through the one hole Dino had already made. Once the light was reassembled, we epoxied it to the top and then stacked books under it to keep it in place until it dried. Boom.
Dino replaced the faucet with a
cool brass faucet I got on Amazon
. To complete the look, I got a pack of
10 antique brushed brass knobs for $19 on Amazon
. Which is another one of my favorite hacks! Changing up hardware is so so so simple, but instantly transforms whatever you add it to.
So happy with this space now, it can be a topic of conversation or it can completely blend in - so excited to continue to make this home our own!