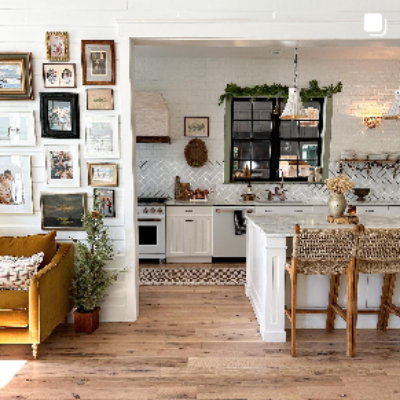
Family Room Wall [ With Benjamin Moore ]
arrowsandbow9 • January 27, 2021
Family Room Wall [With Benjamin Moore]
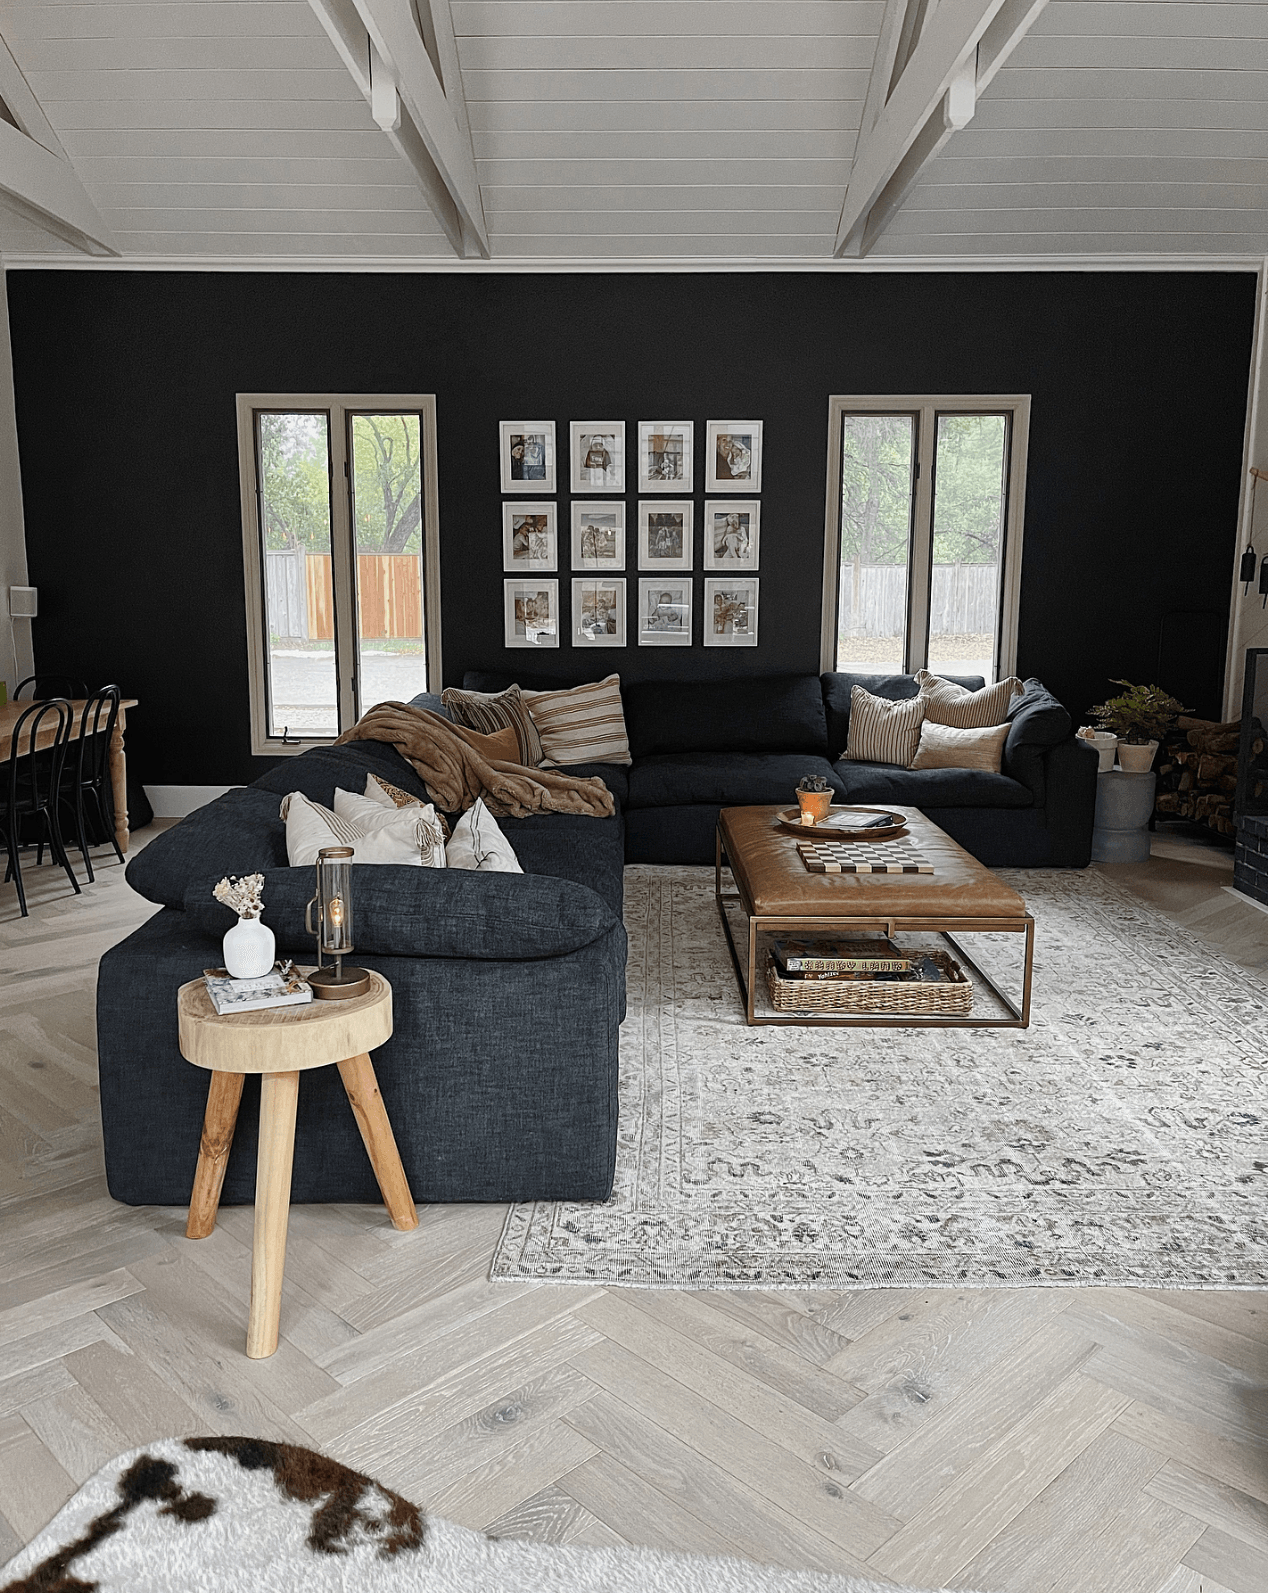
The time has come! We are painting the family room wall black! This room has gone through some serious transformations in the last year - but it is truly the heart of the home. We cuddle, we chat, we swing...there is a lot of family time happening here and I wanted to add a little pizazz to such a large wall. So I called up Mama Lor and said, hey ‘I’ve got a project for you…’
***this is a partnership with Benjamin Moore
, however all opinions are that of my own***
I am using
Benjamin Moore Black Top 2135-10
. This is my favorite black of. all. time. Our old guesthouse is this color, our fireplace is this color, the pantry is that color...as you can see, I love it.
I am using Ben paint by Benjamin Moore - it is SUCH a great paint. It is durable, wipeable and so great for beginners ( or experienced! ) DIY-ers! Don’t be afraid of paint, my friends - it is so amazing to transform your space ( AKA life ) and you can always re-paint!
I am using Ben paint by Benjamin Moore - it is SUCH a great paint. It is durable, wipeable and so great for beginners ( or experienced! ) DIY-ers! Don’t be afraid of paint, my friends - it is so amazing to transform your space ( AKA life ) and you can always re-paint!
I used the Benjamin Moore Color Portfolio App to see how this color would work in this room. I already knew it worked on the fireplace but I wanted to see the whole vision. Ahhhmazing, like incredible. You can take a picture of a wall or a room and play around with paint colors to see how each color will look in a room. Why haven’t I used this before? I know what I am doing on my wild Friday nights...playin’ with my Benjamin Moore Color Portfolio App! lol
I had Mama Lor cut in on the corners because she is a pro [and Miss Foxi girl needed to be fed]! Since we are only painting one wall, we use an angled paint brush on the corners. This allows you to cut in on that wall [you’re painting] and don’t have to worry about taping along the other wall. Load your angled paint brush, point down and move along your wall, pretend it’s like a liner and go straight down with a steady hand. Dip back in your paint, and just go along carefully without touching the wall - gentle strokes - and then feather out your brush on the wall. That way your corners are finished and clean and you can go in with your roller. This leads to way less touching up on the corners too! We did this all along the windows as well!
I had Mama Lor cut in on the corners because she is a pro [and Miss Foxi girl needed to be fed]! Since we are only painting one wall, we use an angled paint brush on the corners. This allows you to cut in on that wall [you’re painting] and don’t have to worry about taping along the other wall. Load your angled paint brush, point down and move along your wall, pretend it’s like a liner and go straight down with a steady hand. Dip back in your paint, and just go along carefully without touching the wall - gentle strokes - and then feather out your brush on the wall. That way your corners are finished and clean and you can go in with your roller. This leads to way less touching up on the corners too! We did this all along the windows as well!

From here, we can go ham. We take rollers and go in immediately, I am in love!
There are a lot of ‘design rules’ in life - and I have to say, I just don’t tend to follow them all [ or any at times! ] We had the gallery wall laid out and instead of making our life harder and taking out each nail and having to re-measure, we are just taking our brush and painting over the nails - best decision yet. Sometimes life needs little shortcuts, you know?
There are a lot of ‘design rules’ in life - and I have to say, I just don’t tend to follow them all [ or any at times! ] We had the gallery wall laid out and instead of making our life harder and taking out each nail and having to re-measure, we are just taking our brush and painting over the nails - best decision yet. Sometimes life needs little shortcuts, you know?
99% of the time when I am painting, I say to myself ‘dang it, I should have done this a long time ago - it was always meant to be this way!’ Except for that green hallway wall in the last house...you remember the one. It looked like poop. That was my only regret.
Roller Tip when doing a DIY paint project: If you are mid roll and you are looking around and you see roller marks as you’re doing a wall, it may be that you are pushing down too hard. Super easy fix...make sure you have enough paint on your roller don’t push too hard and then as you’re releasing and feathering it off. You can also switch directions and this can help with those marks!
Roller Tip when doing a DIY paint project: If you are mid roll and you are looking around and you see roller marks as you’re doing a wall, it may be that you are pushing down too hard. Super easy fix...make sure you have enough paint on your roller don’t push too hard and then as you’re releasing and feathering it off. You can also switch directions and this can help with those marks!
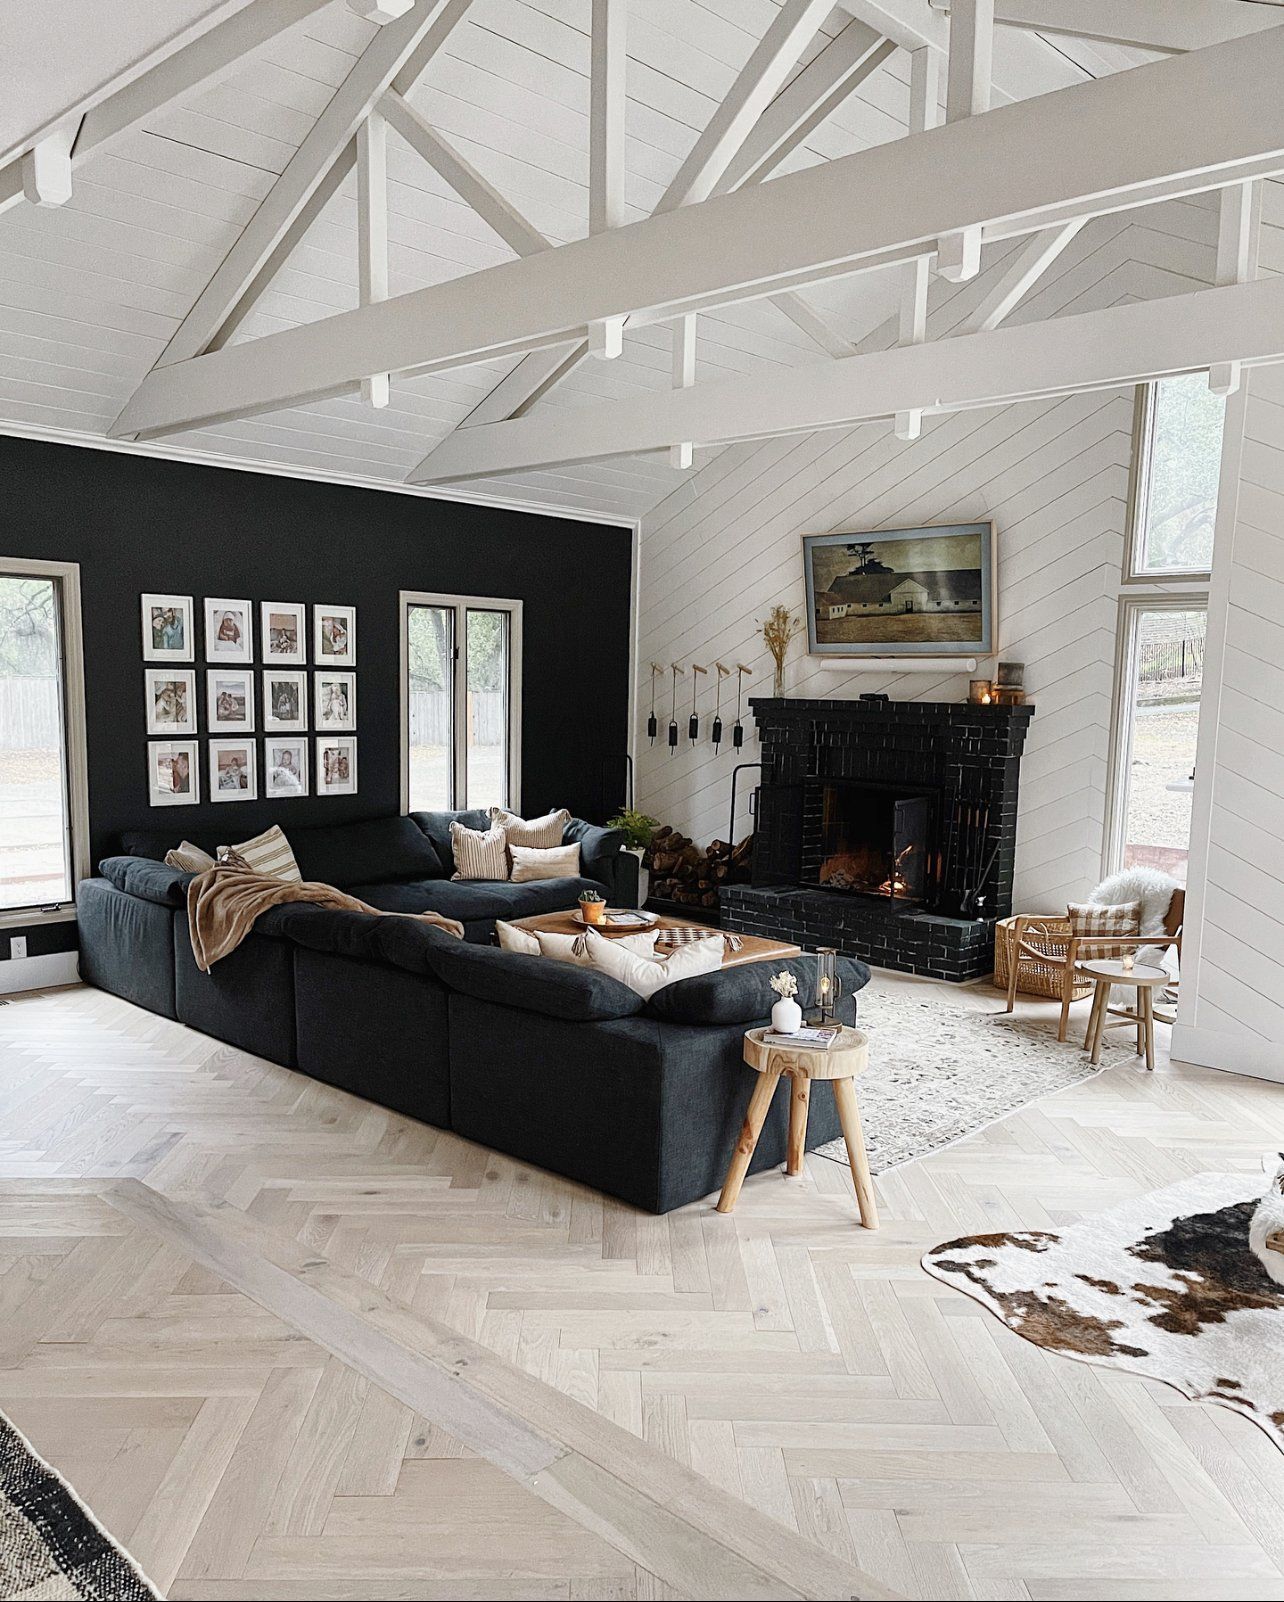
I love love how this room turned out! So happy with it - all we need is Dino keeping up those roaring fire skills goin' and some major snuggles on the couch!

One Hunnit Percent...The Best Brisket
Christmas Cocktails
So you're prepping for a move...
This yummy pairing is the perfect Fall meal!

We flew to Denver to say what we said before...

It's been a bit since we moved into the new house...