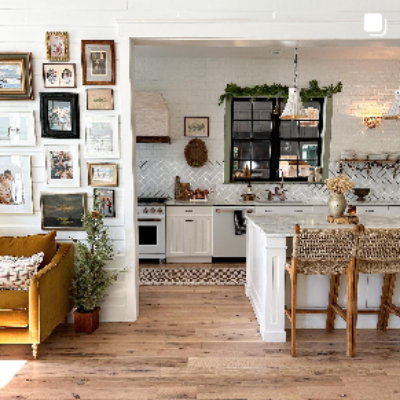
GALLERY WALL #REALLIFE

I am a doer type of gal. Planning is great and all but the fun for me is in the spontaneity.
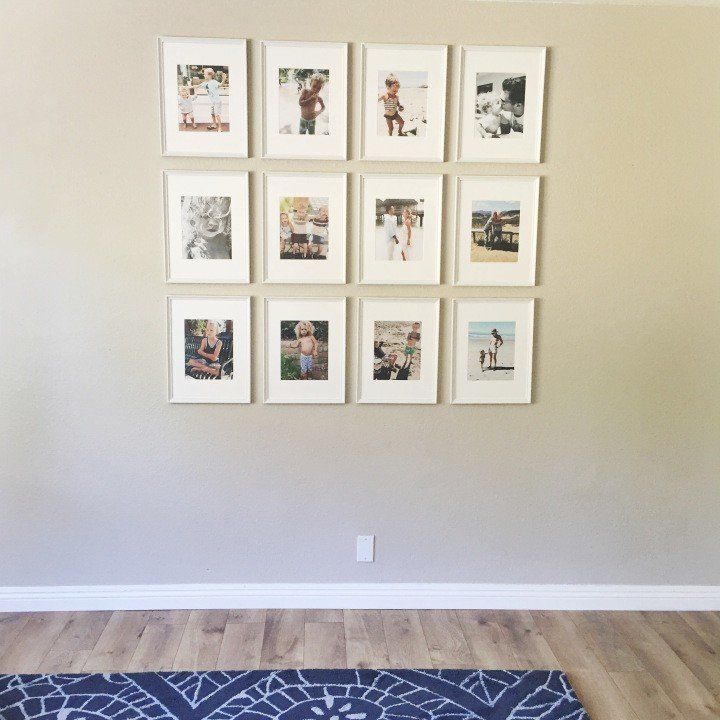
I woke up yesterday with this crazy idea to do a gallery wall. Once my mind is set, it’s pretty much go time and not much will stop it. Here is my experience and ‘dos and don’ts’ of gallery wall hanging!
First I found the pictures I wanted to use. I felt this was a necessary first step because I knew then how many frames I wanted. The kids and I took a drive to Ikea ( I also dragged my dear mother along for a second set of eyes). I had first seen the RIBBA frame online, but when I got to the store the matting was too creamy yellow. I ended up with the KNOPPANG in 8×10, and it is perfect! Crisp white, slightly modern, and very clean!
After I knew what frame size I was going with I ordered the pictures from Costco. ($21 for all 12).
Once I start something I have a really hard time going to bed unless it’s completely finished… A blessing and a curse! So this wall was happening as soon as we got home.
I grabbed myself a hammer, tape measure, pencil, nails, and a little helper I like to call my second child. I laid all the frames out and found the distance I wanted between each frame, (2 in.) Then I measured down from the ceiling to the height I wanted the first row to be (7 in.) I forgot the fact that the hook for the nail was lower so I had to add
that in. (9 in.) At that point I just started with the first row and continued down, using my measuring tape every time.

After I put all the pictures in today, I stopped by Target and picked up some earthquake putty. I will stress myself out to the max every time I walk by this hot mess of “masterpiece” if the pictures are even the slightest off. And I know every time my kids sneeze those frames would move! I put putty on all four sides, so those suckers aren’t going anywhere.
There might be more then a few nail holes behind each of the pictures. I dropped 2 frames and had to re glue them, chipped the base boards 2x so had to go back and fill those and repaint after. I have now come to realize there are far more efficient and easier ways to do this, but it was a learning experience. The kids had fun being a part of it (watching) and I’m so happy with the results!