Kitchen Update
Kitchen Update
Our DIY kitchen renovation project started over break when we were offline for a month and we had so. much. fun! As it turns out, you can actually get a lot done and enjoy every second of it, even if it doesn’t happen for the gram. So let’s get into it!
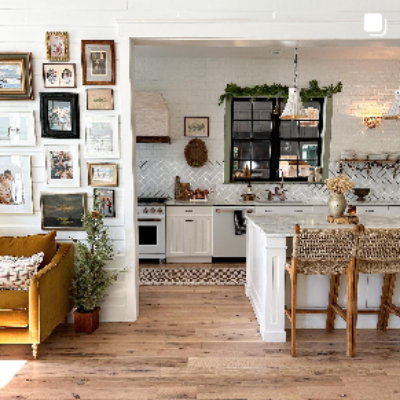
With everything that we do to this house there are always those who like to comment to tell us to leave everything as is because it’s already done. And they’re right, our house was beautifully finished when we bought it and it really didn’t need anything done to it. But, much like with every place we’ve lived, Dino and I wanted to make it “ours” design wise and make it function best for our family. When you are calling some place home, we believe every space has the possibility to become exactly what you want it to be. My goal in this kitchen was to make it ours - but on a budget - and since we didn’t have to do any big demo, we decided to do as much of the work ourselves as possible. By adding lots of texture, some color + thinking outside the box, we were able to renovate this kitchen for under $4K!
We started by removing the upper cabinets on the long wall so we could replace them with open shelving, and immediately, the space felt more open. Then Dino removed the pantry that was next to the fridge. We did this because we will eventually have a side-by-side fridge and freezer so Dino built a box that those will go in once they get delivered… but that could be a while. We did utilize that pantry cabinet unit though, by moving it into the laundry room to make our laundry a walk in pantry. The laundry room is our next project so stay tuned for that!
Next, we removed most of the upper cabinets in the corner that is now our coffee bar. Like I said, the kitchen was beautifully done, but we wanted it to work for our family. This corner of the kitchen had way too much storage for our needs. From what I’ve found, the more empty space you have, the more likely you are to fill it, even if it’s not on purpose. That’s also the reason why I don’t like having a lot of decorative storage furniture pieces. The upper cabinets here also didn’t allow our coffee maker top to open all the way, and this goes back to function. What good is a coffee bar without a functioning coffee maker?!
Dino did all of the demo, drywall, electrical, and construction in this coffee bar area and he did such a good job! We took out the cabinets, removed the backsplash, ran wiring for a sconce I wanted to hang, installed the shiplap and painted it, and put up the open shelves all by ourselves.
I wanted to add a simple design feature to that wall and shiplap seemed like the way to go! It was inexpensive and easy to install, and then we painted it green for a touch of personality. My design style changes with every season of life we’re in and with every home. So, it's been really fun to see how inspired and excited I am by color in this house because our last house was mostly black and white. I think one of my favorite things about design is allowing it to evolve with you and you with it.
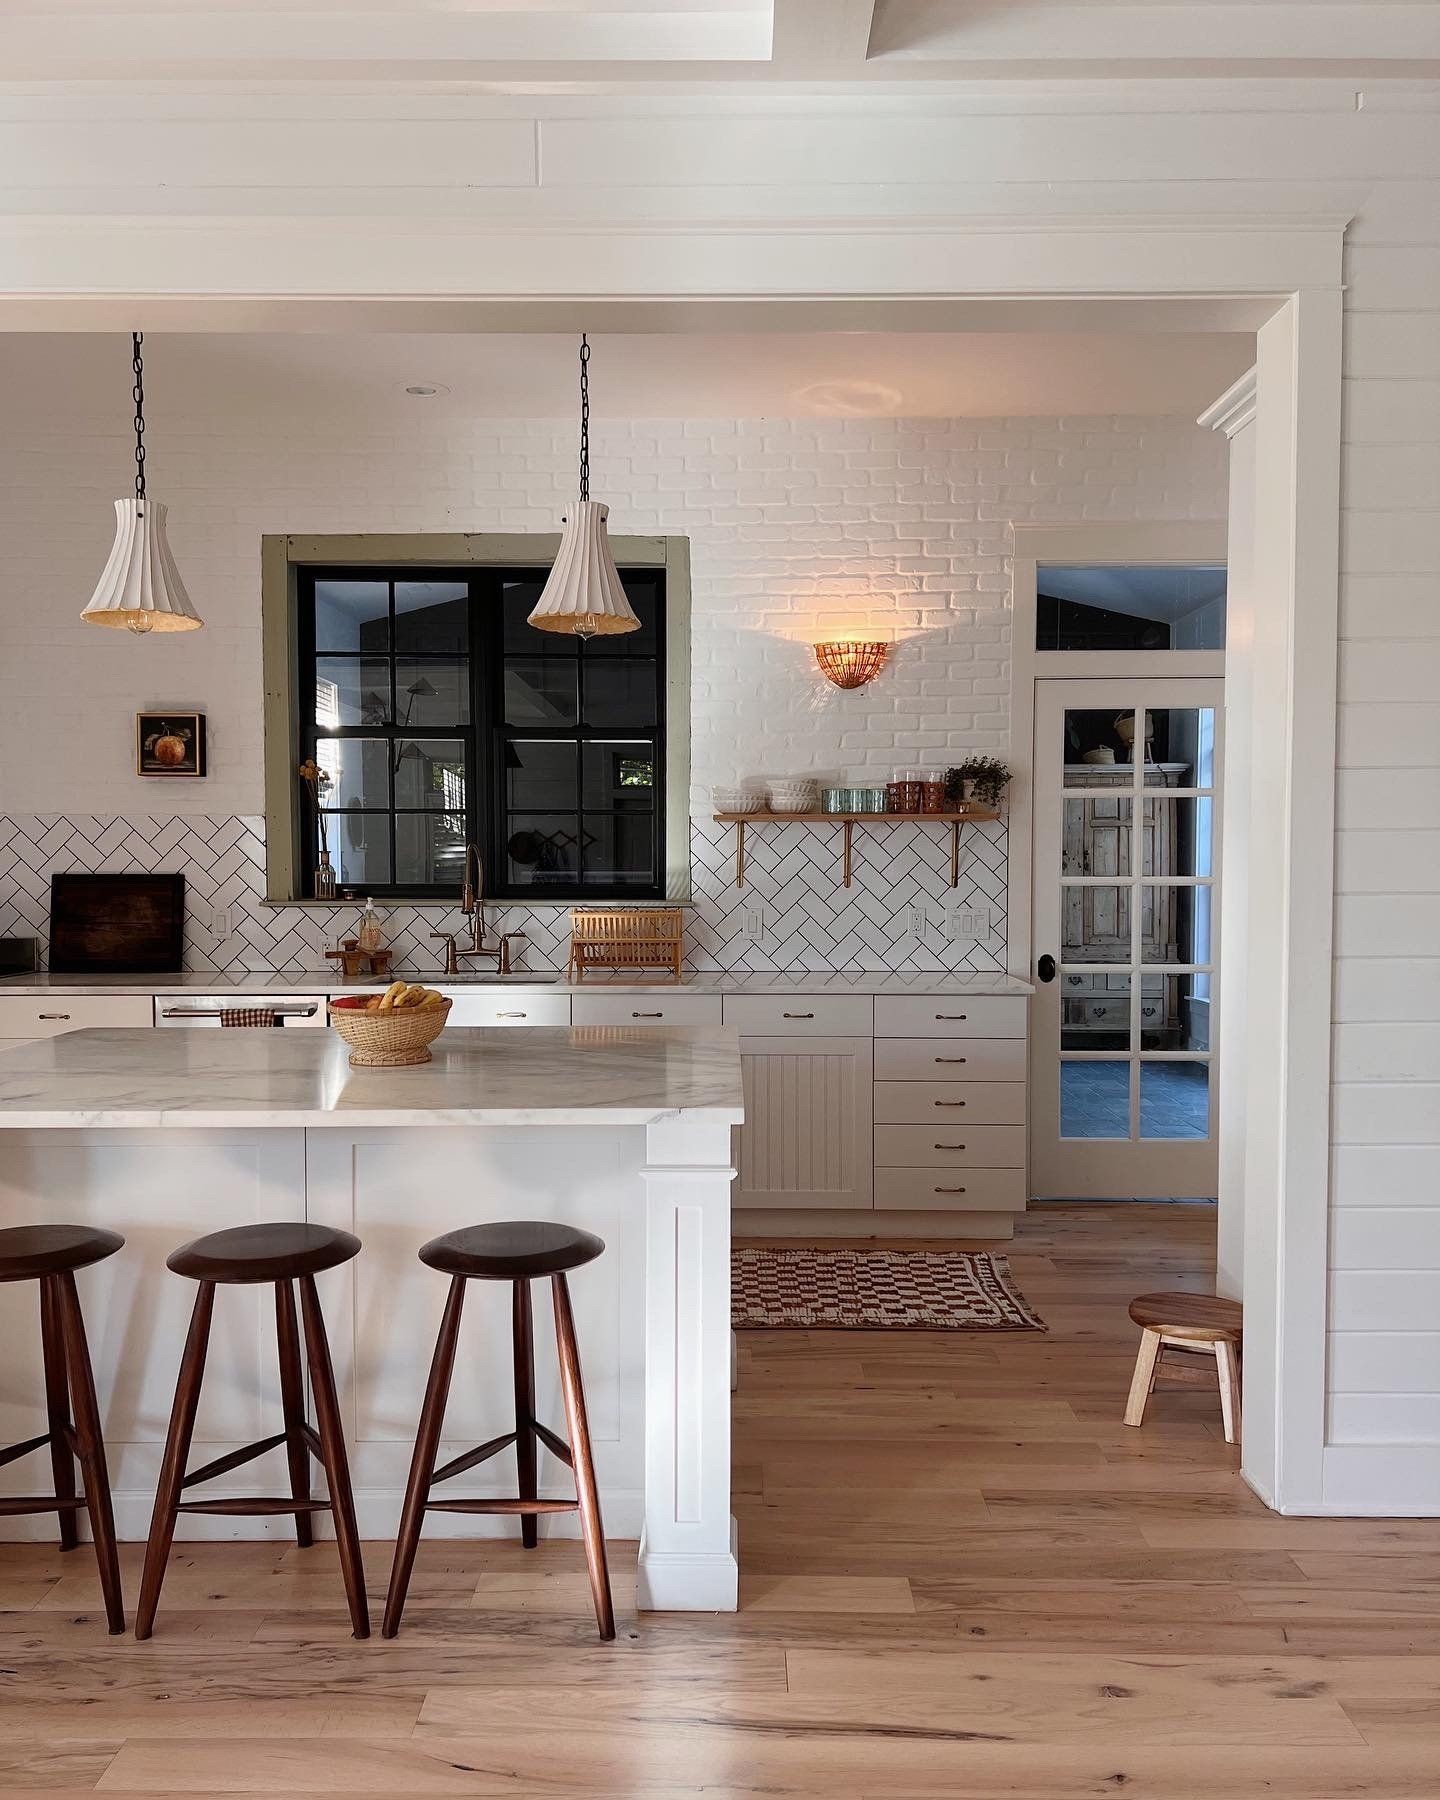
I think the biggest part of this whole kitchen project was the tiling of the back wall. For this part, we did bring someone in. Sometimes with things like this, you have to weigh time and money. I have tiled before, but that wall is huge and it would’ve taken me so long to do. When we got a quote for a great price, we decided it was well worth it to pay to have someone else do it.
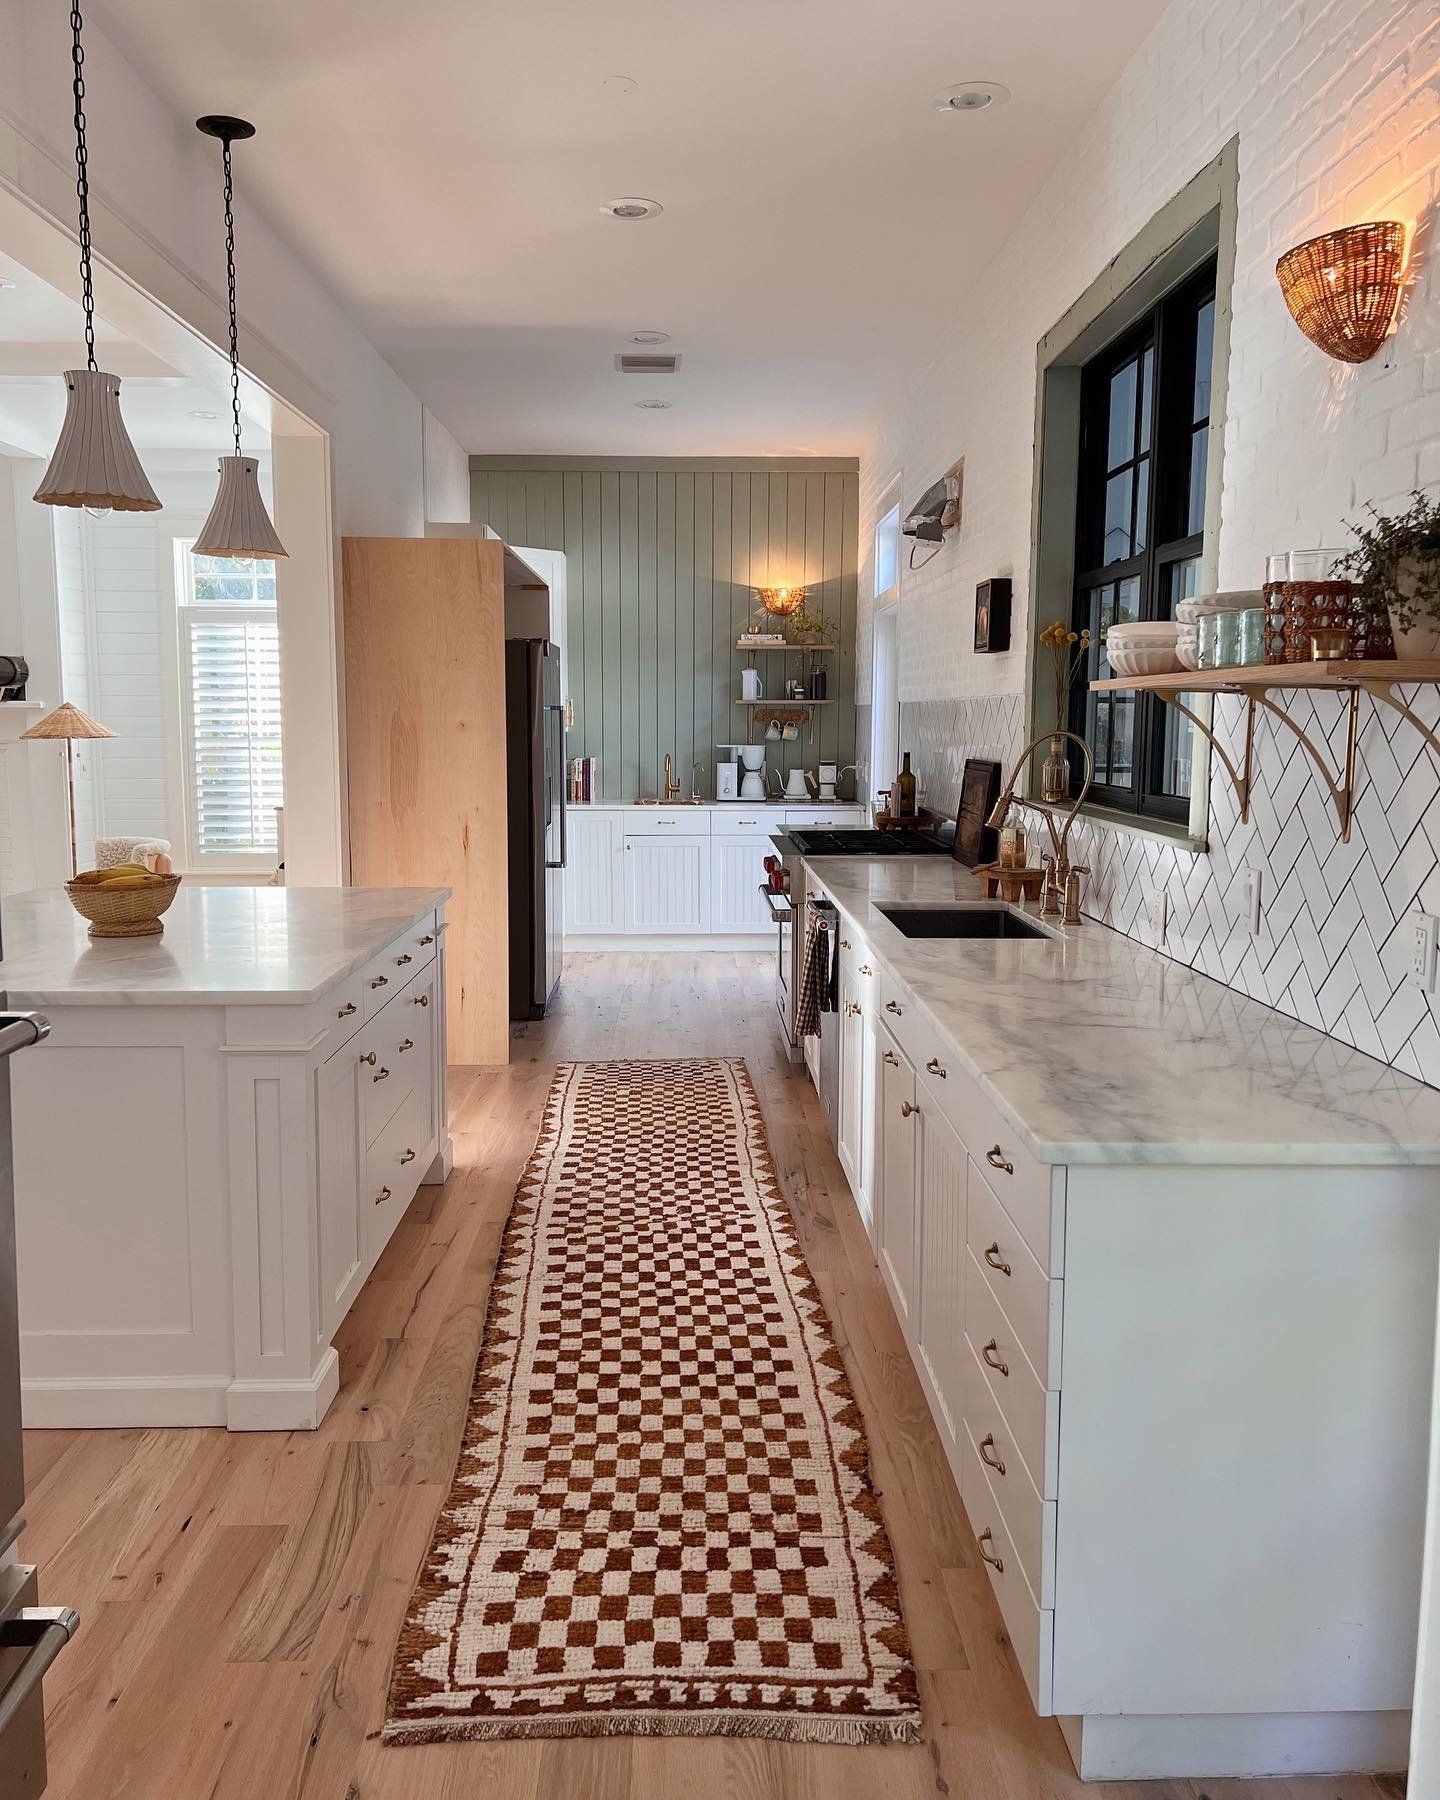
The bottom half of the backsplash is a subway tile in a herringbone pattern and the top is thin brick sheets. I already knew I was going to paint the brick white before it was even installed, so to me it didn’t matter what color brick I got. We bought a bunch and then returned the leftovers. We ended up returning 6 packs, so overall we paid a total of $1000 for the entire backsplash and $1500 for the tile work. Once it was installed, that’s when I took a small roller and painted it all white.
I painted the frame of the window black to match the other side. You’ll remember that was one of the first little projects I did when we moved in. And I eventually ended up painting the wood around the window green to bring over the green from the shiplapped wall.
We DIYed the open shelves ourselves with brackets and wood. Before we tiled, we measured and made sure we added blocking behind the wall so the shelf would be solid. The finishing touch was to replace the hardware. The cup drawer pulls felt too country, so I’m happy I ordered new brass knobs and pulls from Battle Creek Hardware.
Sending you lots of love!